BareNeedle
« April 2007 »
S M T W T F S
1 2 3 4 5 6 7
8 9 10 11 12 13 14
15 16 17 18 19 20 21
22 23 24 25 26 27 28
29 30
Entries by Topic
All topics  «
cables
charity knitting
faroese knitting
gansey knitting
Knitting Retreats
nordic knitting
percentage knitting
quick projects
Shop News
stranded knitting
Countrywool Links
Visit the shop!
Blog Tools
Edit your Blog
Build a Blog
RSS Feed
View Profile
Wednesday, 18 April 2007
Cotton, silk, bamboo yarns?

The question of the month around here....what yarns are good for summer knitting and wearing? The only cotton yarn I sell at Countrywool and knit with is Fixation. I absolutely adore it. But, I am feeling the need to find another cotton or bamboo or soy one that knits finer and has some silk in it. I have stocked cotton/wool, cotton/alpaca, cotton/angora, cotton/mohair yarns in the past, and they simply radiate too much warmth.

One reason I adore Fixation is that it comes in 84 colors, and I stock 46 of them. I want to find a really good finer yarn that will be as versatile for my customers. So, it has to come in at least 30 colors.  I am looking for a weight similar to dk or sport: 50 grams and 110-130 yards.

Bamboo has the reputation of being unbelievably soft, but there is something about it being fragile while wet. And silk has an issue all its own...it can have an odor that repels some knitters. Linen can be harsh to the hand. Viscose from wood pulp is a GREAT natural fiber addition for summer, so I am thinking a cotton/viscose yarn would be a way to go. 

Yarns I am considering:

Classic Elite PREMIERE 

Shulana SOJABAMA 

Dale SVALE 

Cascade PIMA TENCEL
 

There are lots of yarns on the market, and If anyone reading this blog has an opinion on what I can look at, please drop me a note. Better yet...be the FIRST to send me an 8"x8" square of the yarn you like all knitted up and washed, along with the label, so I can see for myself. I'll be happy to ship you 2 balls of FIXATION and a sock pattern in return for your trouble. 

send to:
Countrywool

59 Spring Road

Hudson NY 12534 


Posted by countrywool at 7:44 AM EDT
Updated: Wednesday, 18 April 2007 7:54 AM EDT
Post Comment | View Comments (3) | Permalink
Tuesday, 10 April 2007
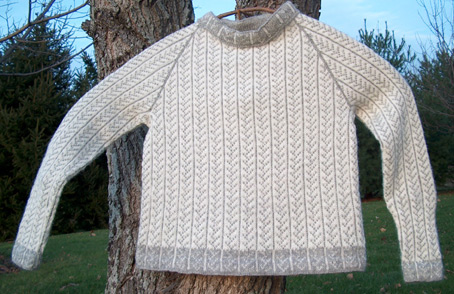
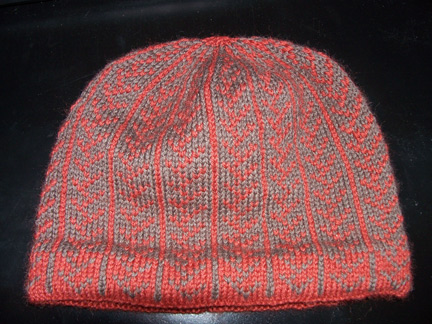
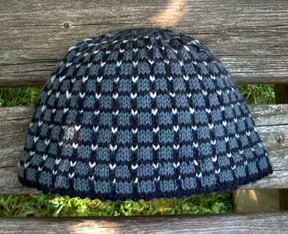
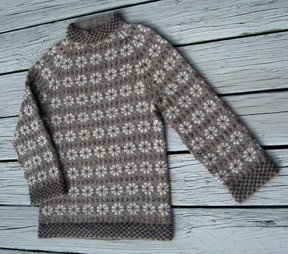
Faroe Vine Sweater and Hat
Topic: faroese knitting


This hat was knit by Tracey Ewing:


Posted by countrywool at 7:30 AM EDT
Updated: Tuesday, 10 April 2007 8:56 AM EDT
Post Comment | Permalink
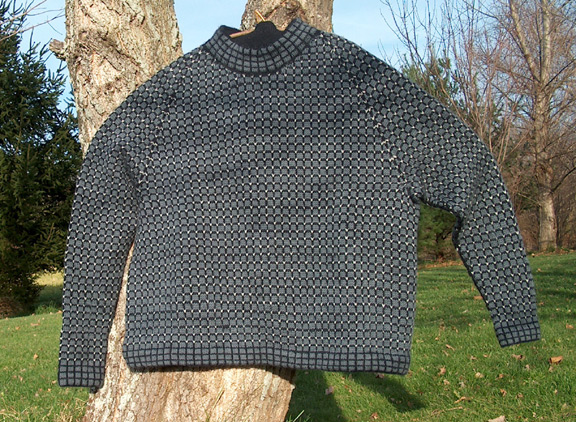
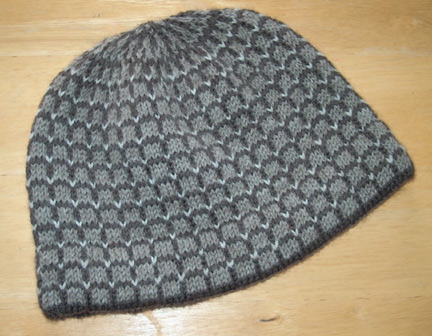
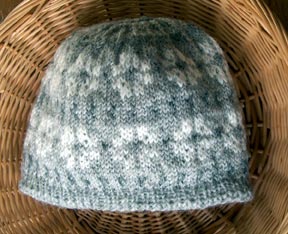
Faroe Broken Root Sweater and Hat
Topic: faroese knitting


Posted by countrywool at 7:21 AM EDT
Updated: Tuesday, 10 April 2007 8:58 AM EDT
Post Comment | Permalink
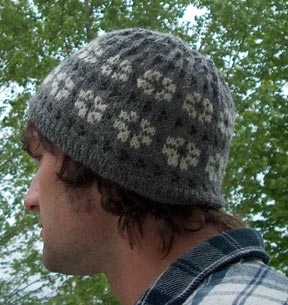
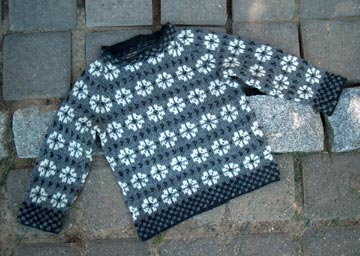
Faroe Blossom Sweater and Hat
Topic: faroese knitting


Pictures tell a greater story than any words, and so here is the Faroe Blossom design.


Posted by countrywool at 7:14 AM EDT
Post Comment | Permalink
Monday, 26 March 2007
Between retreats and decisions
Topic: stranded knitting


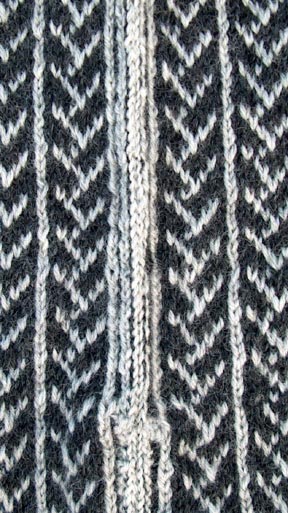
 So, here is the unblocked version of my second edge finish treatment. This is what came to the first Faroe Retreat with me while I mulled over if I liked the two-tone front. I do. So, I have decided to finish this off and block it.

 The first finish was all in charcoal, was double stranded and had standard one-row buttonholes in a garter stitch background. It was too dark and too massive for the eye. So I reknit the right buttonband in light gray and added hidden I-cord buttonholes, which caused a scallop look when buttoned. This necessitated a wider LEFT band, so I took off the original one, reduced the thickness and increased the width.

I think it's a keeper. 


Posted by countrywool at 11:51 AM EDT
Updated: Tuesday, 10 April 2007 8:50 AM EDT
Post Comment | View Comments (2) | Permalink
Tuesday, 13 March 2007
neck steek games
Topic: stranded knitting


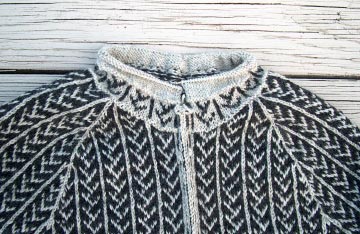
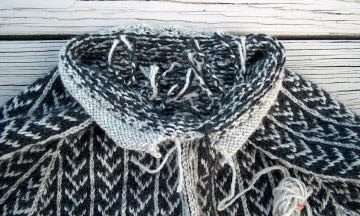
I have polished off the neck knitting. Above you see the outside results of the 2nd steeking job for the neck, and the nicely curved pickup line, along with the solid color facing that is waiting to be sewn down (but not until after the front cardigan steek is done).  I hid any final decreases in the visible purled round. So, yes, the outside looks neat, but take a look at how the curve was handled, and the final braided finishing of the cut open neck steek:


I have resented having ANY bulk in the neck hems from previous neck steeking jobs, and decided a braided steek finish was the way to go. After picking up the curve for the neck line, the steek is cut open and all ends unraveled to the picked up edge, where 3 at a time are braided together and cut off at 2". These braided ends will be hidden inside the neck hem when it is sewn down later. 

No sewing machine and no reinforcement stitching. I am relying on the hairy aspect of HEILO yarn to keep things orderly. 

Now on to the cardigan steek, which is on the agenda for today.

Yesterday evening at Knit Nite, I crocheted a steek reinforcement line up and down both sides of the center stitch.


Two things to report:

  • ...only the simple knitted steek was easy to manage...all the others were a nightmare of confusion. The twisted knit steek was not so bad once I got another sharper-head crochet hook to use.
  • ...I first made the crocheted stitches with sock yarn. It turned out to be SO slippery, that I was afraid it would not hold the stitches after cutting, so I went back to using HEILO.
I will report on the steek cutting and finishing next. 

Posted by countrywool at 11:02 AM EDT
Updated: Tuesday, 13 March 2007 8:02 PM EDT
Post Comment | View Comments (1) | Permalink
Monday, 12 March 2007
Steek organization
Topic: stranded knitting


It always takes me longer to get knitting done than I think. It might have to do with the fact that I wrote, and finished (except for the few picture additions I am waiting for) 10 separate patterns that encompass the Faroe Sweater and Hat patterns we will be knitting during the Faroe Sweater Knitting Retreat coming up in 2 weeks (and again in November in the Catskill Mountains).

 Pattern writing, editing, and fine tuning is an art unto itself, and it consumes me when I get into it. All that math is addictive, and figuring out the uniqueness to each size with the stitch pattern chosen is the ultimate challenge, like puzzle solving. The more I write patterns, the more I add sizes. The current batch has 12 adult and 10 child sizes for each stitch design. I want knitters to have the ULTIMATE in size choice when they sit down with their yarns and needles.

 (If you are interested, I am running a first for Countrywool: a computer based knitting pattern design weekend retreat. It will be in late September in the Catskill Mountains of New York. Watch the website for details next month). 

At any rate, I decided to work a separate neck steek at the top of the cardigan:


 This allows for a very neat hem finish that separates the neckband from the cardigan band. This was tricky to write into the directions, and after 2 attempts, and the final knit, I fine tuned the wording. I am eternally grateful to Char for her test knitting the pattern, and keeping me informed about what doesn't work and what can be clearer. 

The neck steek finish has been FABULOUS fun, and I will  get that on the blog next.


Posted by countrywool at 8:58 AM EDT
Updated: Monday, 12 March 2007 9:06 AM EDT
Post Comment | Permalink
Sunday, 4 February 2007
Steeking Stranded Knitting
Topic: stranded knitting

I am having way too much fun experimenting. 

I finished the gawdawful January task of bookkeeping/inventory/taxes and I get up in the morning now READY TO KNIT. Each day is brighter as I leave behind the columns of numbers and misguided receipts. IS THERE ANYTHING FUNNER THAN KNITTING?

 I have tried for an hour to get good pictures of what I am doing. I give up. I need a better camera or better lighting or a steadier hand. So, forgive these less than clear shots.

 My steek experiment will not be over until I have cut and sewn and finished off the front of this cardigan. As much as I have been experimenting with steek creation, I have narrowed down the finish I want to use. Mary Ann Stephens has provided a WONDERFUL on-line tutorial on the whys and ways of steeking. I have read and re-read her words, as well as examples and instructions in Alice Starmore books, books from Elizabeth Zimmermann and Meg Swanson, and patterns from Dale of Norway.  Hers' looks to be the best for the finished look I want. We'll see.

I added 5 stitches to the beginning of the cast-on round in which to create the steek, which will be cut into and turned down once the sweater is ready for adding the cardigan bands for the front closure.

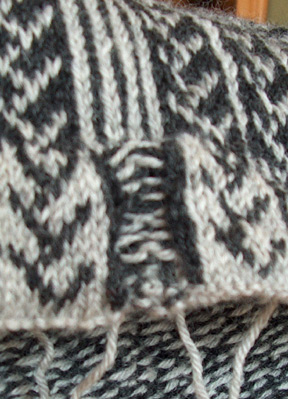
I started off with a purled steek, with unused yarns carried in the front of the work (lowest portion picture): 


This ended up being in the already-turned-under-and-sewn-down hem. Notice how clearly we can see the columns of charcoal knit stitches on either side of the steek. These are the stitches I will be picking up to work the edging. I hated making this steek and it looks sloppy, which bothers me ALOT.

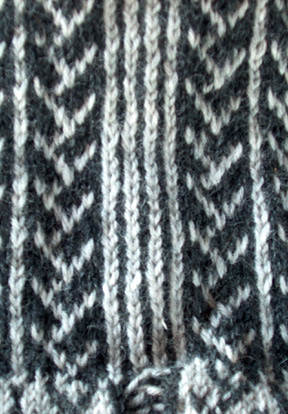
Then I sailed into the normal knitted steek, choosing to make the color changes in vertical lines for clarity:


This one makes me very happy while doing it and also looking at it waiting for the next step. At this point I am almost thinking about using the gray stitch OF the steek at either side as my pick up row, which then turns the real steek into just 3 stitches wide. Hmm.


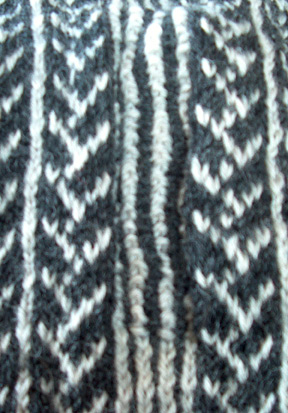
Then I decided to make a purled steek that looks neat, carrying the yarns on the inside:


This one looks MUCH better, and I still see the vertical lines I need for cutting. If the final finish is remarkably better than the knit steek, then I may opt for this style another time.


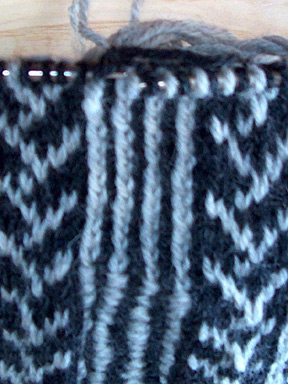
And finally, for today at least, is the twisted knit steek:


This one is supposed to grab better after cutting. I like making it and we'll see how the twisted knits affect the final flatness of the finish. 


The only other steek left to experiment with is the wrapped steek, which I intend to make at the neck. I resented the bulk of a cut edge when I last reworked a finished regular steek on this pullover version of the Faroe Vine sweater, FLAWLESSLY knit by Carol Slauson:


So, stay tuned for the last steek sometime in the next 2 weeks. I have to get to the top of my cardigan before I can play more.


Posted by countrywool at 9:32 AM EST
Updated: Sunday, 4 February 2007 9:45 AM EST
Post Comment | View Comments (3) | Permalink
Friday, 2 February 2007
CIC Sweater #5 (final) - Shoulder decreases, Neck finish and Underarm grafting
Topic: percentage knitting

Hi all! When last we left our sweater, it was in three units: a tube of the body, and two tubes of sleeves. Now we will put them all together on the big circular needle that the body is on.
First we need to find, mark and remove the underarm stitches. These few stitches will later be grafted, kitchenered or simply sewn together.

If you know the number of stitches on the body needle, you can figure out the number needed for the underarm. Elizabeth's Percentage System, or EPS, tells us that 8% of the body stitches becomes the underarm. So, if we had 108 sts on the body from our original example, 8% would be .08 x 108 = 8.64 sts. We can round this to whatever we want, so I'll go down to 8 sts. These underarm sts will be found in 4 places in your knitted tubes, so let's go and find and mark them.

First of all, cut off any yarns attached to the sleeve tubes and the body tube. Leave 8" for darning in later.

It is easier to take 18" pieces of thick wool to use as underarm holders. I also like the two-ended holders that Clover and others make.

At the top of each sleeve tube, find the 4 sts before and the 4 sts after the beginning of the round. Remove ONLY these underarm stitches and put them on a holder. Tie the holder yarns ends together. Make sure you do the same for sleeve #2.

Now, on the body tube, find the 4 sts before and the 4 sts after the beginning of the round. Remove these underarm stitches and put them on a holder. You now have to find the underarm sts that are exactly halfway around the body tube and mark them by running your holder yarn or holder through them. Find them this way:

Figure the body number (108) - 2x the underarm sts (2 x 8 = 16)= 108 - 16 = 92. Now take THAT number and divide by 2. 92/2 = 46. So, in our example, there are 46 body sts for the FRONT and 46 body sts for the BACK.

Tie the holder yarns ends together.  (you do not have to pull them off the needle JUST YET).

At this point you are now ready to knit the sleeve tubes ONTO the body needle. Make sure the sleeve tubes are on needles that you can knit off of.

Find or make 8 ring markers or safety pins big enough to slide over the needle ends. Make sure two of them are the same bold color (and you can use a red yarn tied onto them OR a magic marker to help). Find two huge safety pins or clip-type stitch holders and a darning needle. Settle yourself down with a cup of something and plan to spend close to an hour to do the following:

1. Clip each sleeve to its correct position on the body, matching the underarm sts on holders. Clip through the sleeve just below the stitches on a holder, and through the body at the same point. You might even like to use 2 clips so it doesn't shift while you knit.

2. Lay the sweater down with the sleeves on the right and the left. At the left sleeve spot where it meets the body sts, use your darning needle to darn in the end of a ball of new yarn onto the body side of the join, invisibly on the inside. This allows you to start knitting with a tight stitch. You will start knitting at this point and it becomes the Beginning of the Round (BOR).

3. Get out your two Bright Markers. Slip the last stitch on the body needle (just before the underarm stitches that you marked and removed) to the needle that is holding the sleeve sts. Place a Bright Marker on the needle that is holding the body sts. With the yarn you darned in, K2 sts TOG (knit two stitches together) from the needle that the sleeve stitches are on. Place another Bright Marker. The stitch you just knit is the BOR.

4. Knit all sts of the sleeve ONTO the body needle, but stop just before the last stitch of the sleeve. Place a marker. Slip the last st of the sleeve onto the body needle.  K2 sts TOG. Place a marker. The first (left) sleeve needle should now be empty and put it aside.

5. Knit across the FRONT of the body to 1 stitch before the underarm sts on a holder. Place a marker. Slip 1 stitch to get access to the underarm stitches that are sitting on the body needle. Slide them carefully off the body needle. Slide the slipped stitch on the body needle to the sleeve needle. K2 sts TOG. Place a marker. Knit all sts of the right sleeve ONTO the body needle, but stop just before the last stitch of the sleeve. Place a marker. Slip the last st of the sleeve onto the body needle. K2 sts TOG. Place a marker. The second (right) sleeve needle should now be empty and put it aside.

6. Knit across the BACK of the body until you bump into the BOR marker.

Your sweater is joined! Knit 2 rounds.

SHOULDER DECREASE
You now have a LOT of stitches together on the big circular needle.

The job now is to gradually and graceful reduce the number of sts to just those needed for the neck opening, and create the top of the sweater. The shaping we will do is called raglan.

To figure out how deep to make the shoulder area, we simply duplicate the measurement we figured for the top of the sleeve. In this case, it was 8" across. So, we'll make the top of the sweater or the shoulder area 8" deep.

The first thing we need to do is to count how many rounds will make 8". So, take out the sweater body and lay it as flat as you can to find a spot where you can measure 8" high. Do not measure where the ribbing edge sts are, but start an inch above them. Get out 2 pins and a ruler and a big sheet of paper (which will be where you write down the shoulder instructions). Put the ruler on the body of the sweater the LONG way from bottom to top, with the "0" end one inch above the ribbing and put a pin there. Now, at 8", put another pin. Take the ruler away. Find some good light and using the point of a needle, carefully count the rounds between both points. Each round  is one "V", or an upside down "V". Write down the number of rounds you count. That is YOUR magic shoulder number.

Raglan shoulder shaping is accomplished by inserting just enough decrease rounds in the knitting to get to the number of sts you need for the neck. Each decrease round gets rid of 8 sts. So, here's some math and an example.

Let's say that our 108 stitch sweater is measuring  32 rounds for 8 inches. We will need to knit a TOTAL of 32 rounds for the shoulder area, including any neckband we will add last. Let's figure the neckband will be 4 rounds of ribbing, so our shoulder area will be 28 rounds TOTAL.

Write down on your piece of paper, from top to bottom, Rounds 1-32. On round 1, write JOIN, and mark it off as done (we already did that). On round 2 write KNIT EVENLY AROUND, and we already did that, too, so mark that off. Leave Rounds 3-28 blank for now. On rounds 29-32, write RIBBING. If YOUR magic number is not 32, adjust the directions below to reflect that, leaving the last 4-6 rounds for ribbing: (you want about an inch of ribbing)

Now the fun begins.

The number of sts on the top of your sleeve is also the same number of sts for the neck! Is that cool, or not? So, find that number. In our example, that would be 48 sts.

Raglan decrease rounds gobble up 8 sts every time you work them. We know we have to get from all the sts on our needle down to 48. So count the sts on your needle. Our example has 164 sts. 164-48 (what we leave on for the neck)= 116 sts to get rid of.

Let's see how close to perfect our raglan decreasing can get us. 116/8 = 14.5. Let's round it down to 14. We have to work a decrease round 14 times between now and the last 4 rounds before the neck.

So, here's what my shoulder instruction paper looks like:

1. Join

2. Knit around

3.

4.

5.

6.

7.

8.

9.

10.

11.

12.

13.

14.

15.

16.

17.

18.

19.

20.

21.

22.

23.

24.

25.

26.

27.

28.

29. rib

30. rib

31. rib

32. rib

If I count all the shoulder rounds left, I have 26 to work with. 14 of them will be decrease rounds. They cannot be all evenly spaced, but that is not a problem with circular knitting! The rule here is to have them wider apart when you start, and closer together at the neck. So, start putting them in every other round starting with round 3, and as you get close to the neck round, put them on every round. I use a pencil to put them in, so I do not have to bother with math at this point, and simply erase what doesn't fit (better than ripping out later!).

So my shoulder direction paper now looks like this:

1. Join

2. Knit around

3. D (means decrease round)

4.

5.D

6.

7.D

8. (as you have fewer stitches, you might need to use larger 16" circular needle to have them fit)

9.D

10.

11.D

12.

13.D

14.

15.D

16.

17.D

18.

19.D

20.

21.D

22.

23.D

24.

25.D

26.

27.D

28.D

29. (change to smaller sized 16" circular needle) rib

30. rib

31. rib

32. rib

Proceed knitting, with your DECREASE rounds worked this way:

 KEY:

K=knit

K2TOG= knit 2 stitches together as one (decrease)

SSK= slip first stitch as if to knit, slip second stitch as if to purl, put point of left needle on front of both those sts and K2TOG (decrease)

RAGLAN DECREASE (this is worked 4 times total each decrease round):

*slip marker, knit stitch between markers, slip marker, K2TOG, K across to 2 stitches before next marker, SSK*    repeat from * to * 3 times more.

NECK BIND OFF INSTRUCTIONS: I recommend a SEWN OFF BIND OFF to allow for maximum stretch.

SEWN OFF BIND OFF:

Cut yarn leaving 4x the measure around the stitches on the needle. Thread end through darning needle. Cast off as follows: *Darning needle goes through 2 sts as if to purl. Leave sts on needle. Darning needle goes through first st AGAIN, but as if to knit and then that st is dropped off needle*  Repeat * * until all sts have been cast off.  Sew yarn to first st.

 For Frannie:

If you have more sts than the example did,that is NO PROBLEM! That means you will need to do a few more decrease rounds before you reach the neck.

You have 168 sts and your neck needs to be 48 sts.

168-48 = 120. And divide the increases (8 per round) into the number to get rid of: 120/8=15. If you make 15 rounds of decrease, you will arrive at EXACTLY the neck number needed. So, the answer to  your question is YES...add in one more round of decrease on your shoulder instruction list  CLOSE TO THE NECK. Looks like round 26 will ALSO be a decrease round for you.

FINISHING:

Your circular raglan sweater should be completed to the neck, and bound off with a sewn off bind off. You are left with stitches on holders at each underarm and a yarn end or two (or 7) all over the sweater to darn in.

 Darn in those wild ends first. Get them out of the way.

Tackle the underarms, one at a time.

 First, get out a darning needle. Look at the yarn ends that are attached to the underarm stitches. Cut them all to 6”. Resist the temptation to use of them to sew the underarms WHILE IT IS ATTACHED.

Lay your sweater out with the underarm stitches facing each other like this (second picture down).

Thread a 24” [piece of yarn through a darning needle. Leaving a 6” end, start sewing the bottom and top stitches together, while on the needles, from right to left, like this:

GRAFTING or Kitchener Stitch or Weaving

        On front needle:

        1. Pass tapestry needle through as if to knit, drop st off needle

        2. Pass tapestry needle through as if to purl, leave st on needle

        On back needle:

        1. Pass tapestry needle through as if to purl, drop st off needle

        2. Pass tapestry needle through as if to knit, leave st on needle

      That's it.  Just remember to keep the tension loose.

When you finish grafting across, you will need to do a little magic to weave in and hide your end and secure the triangular area of knitting that greets you.

Do the same where you started.

You are done! I would love to see pictures of what you have made J

Claudia at Countrywool

Circular Knitting Techniques Retreat in the Catskill Mountains of NY

May 18, 19 and 20, 2007


Posted by countrywool at 8:09 AM EST
Updated: Friday, 2 February 2007 8:13 AM EST
Post Comment | Permalink
Wednesday, 24 January 2007
CIC Sweater #4...Joining the body and sleeves
Topic: percentage knitting

Hi all! When last we left our sweater, it was in three units: a tube of the body, and two tubes of sleeves. Now we will put them all together on the big circular needle that the body is on. 

First we need to find, mark and remove the underarm stitches. These few stitches will later be grafted, kitchenered or simply sewn together. 

If you know the number of stitches on the body needle, you can figure out the number needed for the underarm. Elizabeth's Percentage System, or EPS, tells us that 8% of the body stitches becomes the underarm. So, if we had 108 sts on the body from our original example, 8% would be .08 x 108 = 8.64 sts. We can round this to whatever we want, so I'll go down to 8 sts. These underarm sts will be found in 4 places in your knitted tubes, so let's go and find and mark them. 

First of all, cut off any yarns attached to the sleeve tubes and the body tube. Leave 8" for darning in later. 

It is easier to take 18" pieces of thick wool to use as underarm holders. I also like the two-ended holders that Clover and others make. 

At the top of each sleeve tube, find the 4 sts before and the 4 sts after the beginning of the round. Remove ONLY these underarm stitches and put them on a holder. Tie the holder yarns ends together. Make sure you do the same for sleeve #2. 

Now, on the body tube, find the 4 sts before and the 4 sts after the beginning of the round. Remove these underarm stitches and put them on a holder. You now have to find the underarm sts that are exactly halfway around the body tube and mark them by running your holder yarn or holder through them. Find them this way:

Figure the body number (108) - 2x the underarm sts (2 x 8 = 16)= 108 - 16 = 92. Now take THAT number and divide by 2. 92/2 = 46. So, in our example, there are 46 body sts for the FRONT and 46 body sts for the BACK. 

Tie the holder yarns ends together.  (you do not have to pull them off the needle JUST YET).

At this point you are now ready to knit the sleeve tubes ONTO the body needle. Make sure the sleeve tubes are on needles that you can knit off of. 

Find or make 8 ring markers or safety pins big enough to slide over the needle ends. Make sure two of them are the same bold color (and you can use a red yarn tied onto them OR a magic marker to help). Find two huge safety pins or clip-type stitch holders and a darning needle. Settle yourself down with a cup of something and plan to spend close to an hour to do the following: 

1. Clip each sleeve to its correct position on the body, matching the underarm sts on holders. Clip through the sleeve just below the stitches on a holder, and through the body at the same point. You might even like to use 2 clips so it doesn't shift while you knit. 

2. Lay the sweater down with the sleeves on the right and the left. At the left sleeve spot where it meets the body sts, use your darning needle to darn in the end of a ball of new yarn onto the body side of the join, invisibly on the inside. This allows you to start knitting with a tight stitch. You will start knitting at this point and it becomes the Beginning of the Round (BOR). 

3. Get out your two Bright Markers. Slip the last stitch on the body needle (just before the underarm stitches that you marked and removed) to the needle that is holding the sleeve sts. Place a Bright Marker on the needle that is holding the body sts. With the yarn you darned in, K2 sts TOG (knit two stitches together) from the needle that the sleeve stitches are on. Place another Bright Marker. The stitch you just knit is the BOR. 

4. Knit all sts of the sleeve ONTO the body needle, but stop just before the last stitch of the sleeve. Place a marker. Slip the last st of the sleeve onto the body needle.  K2 sts TOG. Place a marker. The first (left) sleeve needle should now be empty and put it aside. 

5. Knit across the FRONT of the body to 1 stitch before the underarm sts on a holder. Place a marker. Slip 1 stitch to get access to the underarm stitches that are sitting on the body needle. Slide them carefully off the body needle. Slide the slipped stitch on the body needle to the sleeve needle. K2 sts TOG. Place a marker. Knit all sts of the right sleeve ONTO the body needle, but stop just before the last stitch of the sleeve. Place a marker. Slip the last st of the sleeve onto the body needle. K2 sts TOG. Place a marker. The second (right) sleeve needle should now be empty and put it aside. 

6. Knit across the BACK of the body until you bump into the BOR marker. 

Your sweater is joined! Knit 2 rounds and the next set of directions will arrive on Thursday morning.


Posted by countrywool at 10:35 AM EST
Post Comment | View Comments (1) | Permalink

Newer | Latest | Older